
Step by step overview on how to buy Litecoin on Bitstamp
Bitstamp is a European based cryptocurrency marketplace founded in 2011. It allows people from all around the world to trade Litecoin with ease. Its main priority is to provide safety and security to clients’ personal information. The platform also offers a low-fee way of exchanging large amounts of digital currencies and currently belong in the top ten for its trading volumes.
Here you will find easy-to-follow steps on how to buy Litecoin on Bitstamp.
- Sign-up an account on Bitstamp
- Change your Bitstamp account password
- Verify your Bitstamp account
- Secure your Bitstamp account by setting 2FA
- Fund your Bitstamp account
- Start trading on Bitstamp
1. Sign-up on Bitstamp
Click here to go to the Bitstamp site.
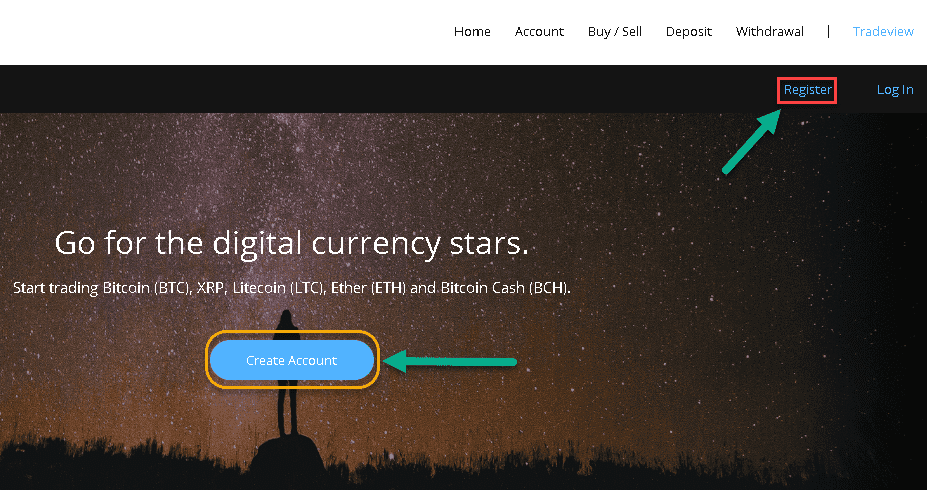
On the homepage hit on ‘Register’ or ‘Create Account’ to start.
Provide your First and Last Name, E-Mail address and Country. Tick on the ‘Agreement’ and ‘I’m not a robot’ boxes and click Register.
Your registration is now complete. Check your email for the Customer ID and Password.
Awesome! You now have an account with Bitstamp.
2. Change your Bitstamp account password
On your first log-in, you will be prompted to change the password provided to you. To do this, click on the Log-in tab on the upper right of the screen.
- Enter the Client ID and Password given to you via email and hit Log in.
- Fill in your current and new password in the fields provided and hit Change Password.
- After changing your password, you will be asked to log-in to your account again.
- On this page, you will see a message informing you that your password change is successful.
Nice! You have successfully changed your Bitstamp password.
3. Get verified on Bitstamp
For you to make deposits and withdrawals as well as unlock other essential features on Bitstamp, we will now go ahead and ‘Verify’ your account.
There are two account types on Bitstamp. If you are an individual and only represents yourself, you will have to choose ‘Personal Account’ and ‘Corporate Account’ if it’s for company use.
In this example, let’s select Personal Account Verification.
Complete the form by supplying your Personal Information.
Follow the instructions regarding the submission of documents under the ‘ID Document’ section and provide the information required on the form.
Upload your documents and supply the details as required. Once done click on Submit Verification Request. Bitstamp support will notify you by email regarding the status of your request.
After your request is approved, go to the KYC Form section and supply the necessary information. Doing so may help process your deposits and withdrawals more efficiently.
To do this, tick your name that appears in the upper right corner of the page, and then click View my account> Verify Account> KYC Form. Make sure to provide all the information in each field and hit on ‘Submit’ once finished.
Perfect! Your Bitstamp account has been verified.
4. Secure your Bitstamp account by setting a 2-factor authentication (2FA)
What is 2FA?
Two-factor authentication, also known as 2FA, is an extra layer of security or added protection which we refer as multi-factor authentication. Not only the username and password are required but also a piece of information that only a user possesses. This process is to confirm a user’s claimed identity.
The 2FA process helps lessen the number of identity theft cases and as well as phishing via email. It would be harder for potential intruders to gain access and steal someone’s identity and personal data without that piece of information that only the account owner knows.
In the case of exchanges what the user has are his/her login details such as the username and password. The form of 2FA that a user possesses for this instance is a token or code. The code can be received either through SMS on a user’s mobile phone or via applications like Google Authenticator or Authy.
In this step, we will utilize the Google Authenticator app to enable 2FA on your Bitstamp account. On the left side of the page, locate ‘Security’ and click on it.
Check this if you want to learn more about Google Authenticator.
Hit on the ‘Enable Two-Factor Authentication’ button to proceed.
After downloading the Google Authenticator app on your smartphone, scan the QR code and enter the 6-digit number generated by the app on the ‘Verification code’ box. Click ‘Enable Two-Factor Authentication’ to complete the process.
Note: Write down your ‘Authentication Key’ as this is essential if you lose your phone.
The last phase of this step is now complete with 2FA being set-up successfully on your Bitstamp account.
Excellent! Bitstamp is now safe.
5. Funding your Bitstamp account
Funding your Bitstamp account can be done in different ways. Here, we will show you how to deposit through an EU Bank (SEPA).
SEPA stands for Single Euro Payments Area. A payment integration initiative of the European Union of bank transfers that the euro currency dominates.
Our first step is to change the Trading Pair. We will deposit EUR and buy ETH as an example. In the upper left section click on BTC/USD and select ETH/EUR.
Click ‘Deposit’ located on the top of the page just beside the Buy/Sell tab.
You can find in this section the different ways of depositing money into your account. Select ‘EU Bank (SEPA)’ on the left panel since we are utilizing this option as an example.
Fill in your First and Last Name, Account Balance, and Amount. Then click on Deposit.
Basing on the details which you’ve provided in the previous form Bitstamp will generate you the data as indicated. You need this data for your SEPA money transfer so make sure to take note everything.
After this, you will have to fill in the SEPA form with your information (debtor/payer) and Bitstamp’s data (creditor/beneficiary). This process can be done either at your bank or through online payment.
Note: Include your “Message number” as a transfer reference on the Debtor’s data. This piece of information is vital, so Bitstamp will know that it is your account you claimed to be yours.
SEPA deposits usually take 1-3 business days before they appear on your Bitstamp account (excluding weekends and bank holidays). You will receive a notification via email once your deposit request is confirmed.
If you want to check your balance click on your name that appears in the upper right corner, then go to Quick Overview. Alternatively, you can also view it by clicking View my account.
Under ‘My Account’ is where you can check your balance.
Wonderful! You have funded your Bitstamp account.
6. Start trading Litecoin on Bitstamp
Now it’s time to buy your first Litecoin on Bitstamp!
On the top of the page click on the ‘Buy/Sell’ tab.
itstamp offers four order types (Instant, Limit, Market, Stop).
Instant Order executes immediately under the current price on the market and is the simplest to use among the four.
Limit Order gives you the ability to set a specific price at which you would like to buy the desired amount of Litecoin.
Market Order allows you to buy different cryptocurrencies at the best available market price.
Stop Order is usually used to limit potential losses in case prices suddenly rise or drop.
In this step, we will use ‘Instant Order’ to illustrate the ‘Buying’ process. This order type is advisable for users who would like to make a trade immediately. To begin, click Instant Order (Simple).
For more information regarding ‘Order Types’ do check their faq page here.
Tick ‘Buy ETH’ to go to the next page.
Enter the amount you are willing to spend on the box provided. You will see the Bitstamp fee and the approximate number of $Coin that you will receive. If you agree, do click on the ‘Buy Litecoin’ button.
Here you will see your open order. Bitstamp will notify you after your order is processed and closed.
You can view your balance by clicking your name that appears on the upper right corner under Quick Overview or by ticking View my account.
Your ‘My Account’ section will show you your existing balance which includes the amount of Litecoin you just bought.
Congratulations! You have finally bought your first Litecoin on Bitstamp.